Human Challenge Console Customization Tool
Goal
The tool is designed to offer a seamless and user-friendly experience for tailoring the Challenge Look & Feel quickly.
Using the tool’s results with caution
When customizing the tool, please be sure to keep in mind that the challenge is presented across different displays, and across desktop, tablet and mobile.
The editor allows customization of various elements such as sizes and fonts. It’s essential to thoroughly review the results on your site using these varied displays. We are actively working on a preview tool for assessing these different displays, which is currently in development.
Where to find it
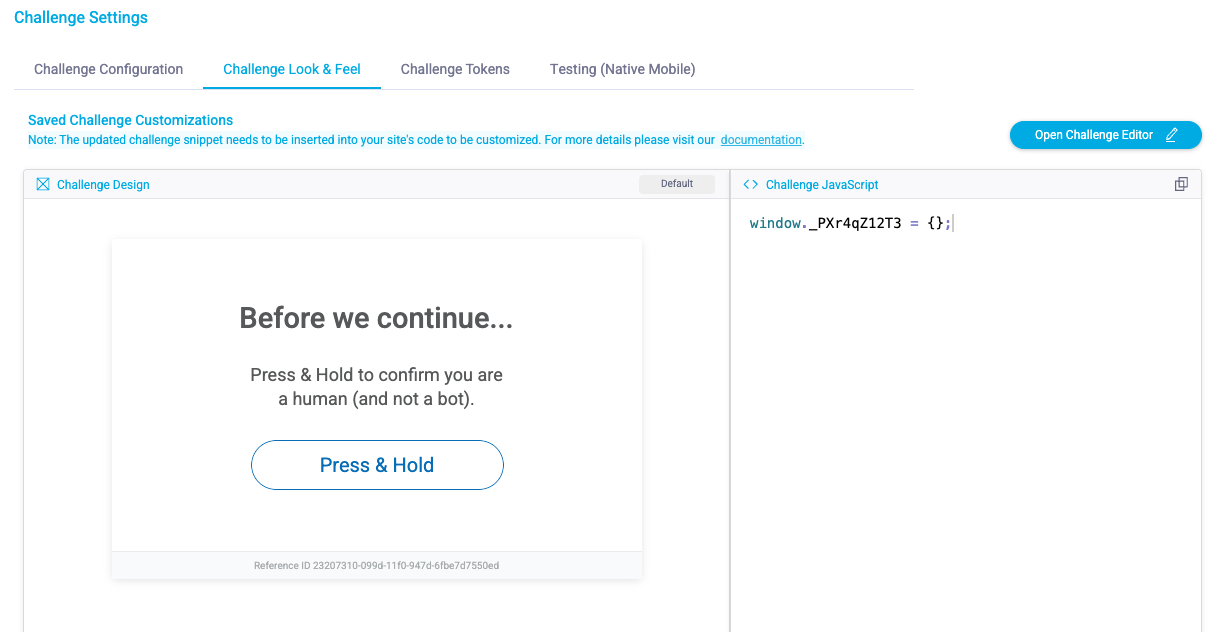
You can find the Challenge Look & Feel from Bot Defender > Settings > Challenge Settings > Challenge Look & Feel.
How to use the output
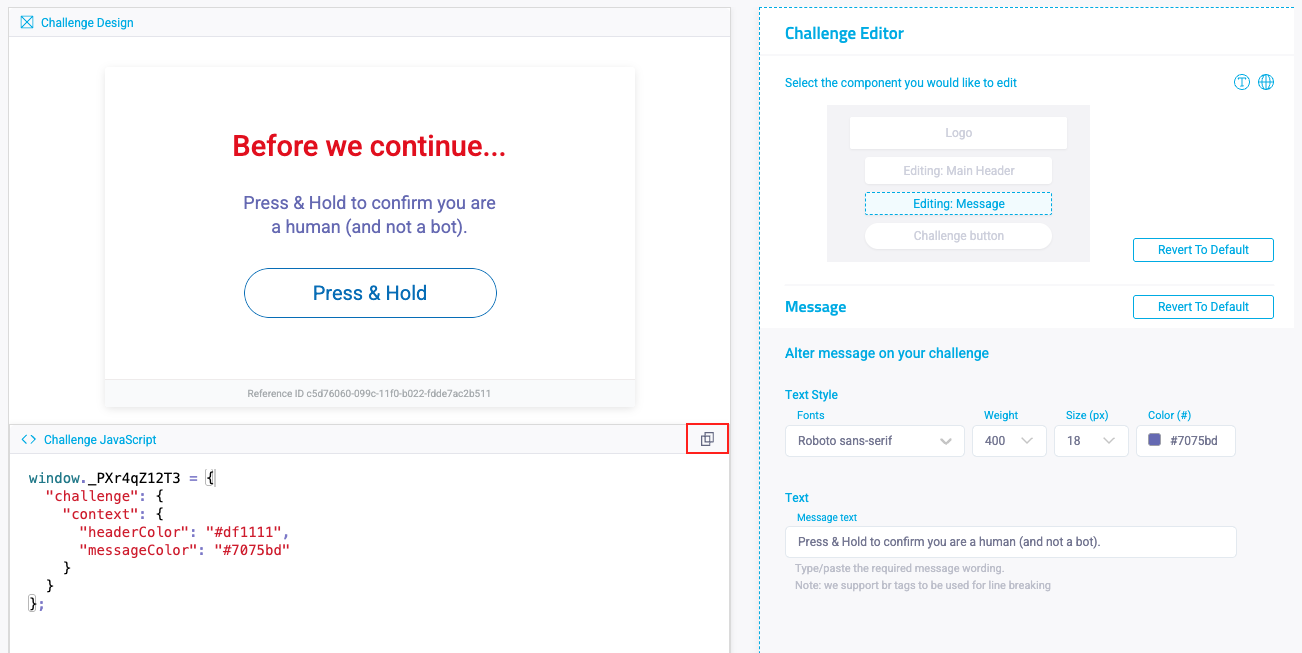
The tool will output a “customization object snippet”. This snippet can be copied in both preview and editor modes in the Challenge Javascript area by clicking the copy to clipboard button.
The challenge can be customized by applying this snippet to the block page - the enforcer provides a configuration property called JSref which allows adding JS resources to the block page.
Integration steps:
- Create and serve a JS file from your domain containing the snippet from the tool
- Set the Enforcer’s JSref configuration property.
for more instructions look for JSRef in the relevant Enforcer’s docs, here are some of the common ones:
Fastly
NodeJS Express
Cloudflare
Please notice the “save changes” button does not actually deploy your changes, and only saves the configuration. You must apply the provided customization object snippet to your application in order for the customizations to apply.
Customizing ABR (Advanced Blocking Response)
When attempting to Customize ABR, make sure the snippet is set on the window within the website pages for which you will present a challenge.
Customizing “Enhanced Accessibility Mode”
The default version of Enhanced Accessibility Mode conforms with WCAG 2.2 guidelines. Any customizations you make may cause issues with accessibility guidelines. We recommend testing this version with existing customizations on a staging environment before using it in production.
Navigating the tool
The customization tool includes two main windows:
- The Preview page - shown directly in the challenge look & feel tab, shows a preview of the customized challenge design on the left, and shows the snippet result on the right
- The Challenge Editor - opened using the Open Challenge Editor button (see above). This is the complete tool for manipulating the different Look & Feel settings which will result in a snippet to be integrated as mentioned above. Please notice saving here only saves the configuration and does not effect your app in any way.
The Challenge Editor
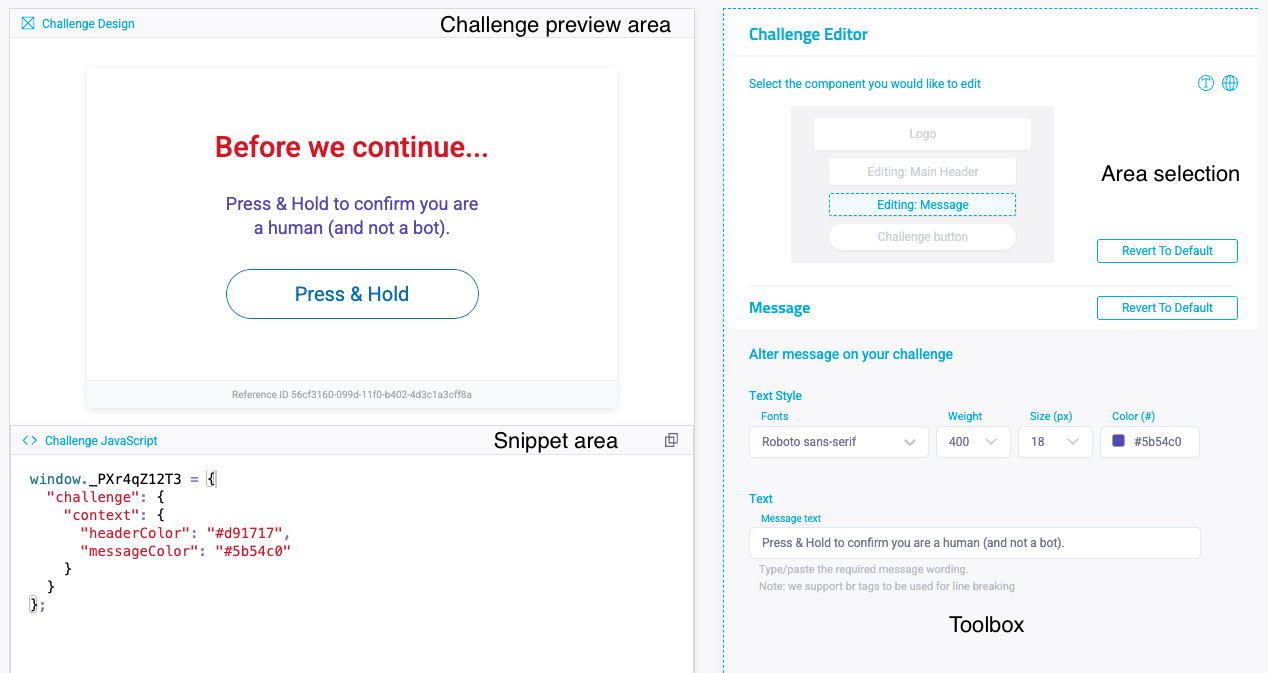
The challenge editor has a few areas:
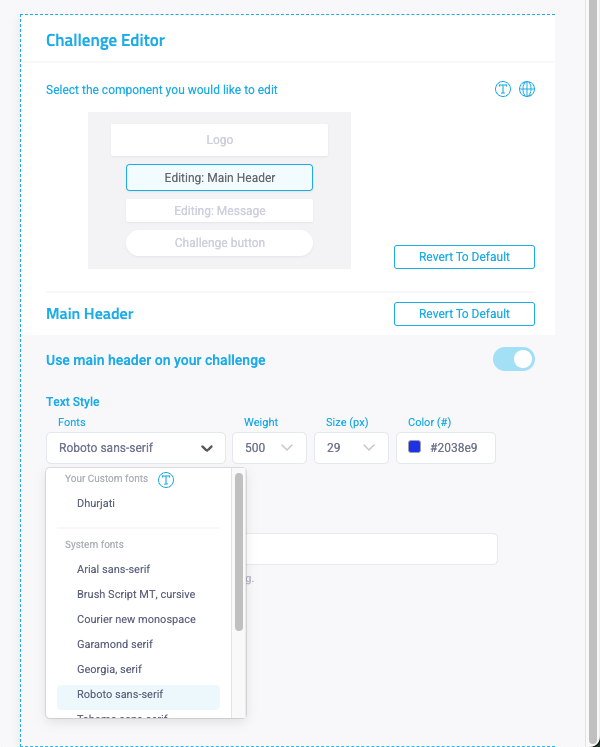
- Area Selection - choose the area within the challenge you want to work on - the Logo, Main Header, Message And button
- Toolbox - will show the customization options for the selected area
- Challenge Preview Area - will update to show a preview of the challenge, updated after every toolbox change.
- Snippet area (Challenge Javascript) - shows an updated customization object to be integrated as mentioned above, can be copied as mentioned before.
Logo
To define a logo, go to the Logo area in area selection, and paste a link to your Logo in the textbox.
Please notice the logo height is limited to 40px and the link’s length is limited to 1000 characters.
Also, the supported formats are jpg, jpeg, png, gif, bmp, webp.

Custom Fonts
Custom fonts can be defined to be used in the header, message and button texts. To define a custom font click on the Web fonts area button and add font definitions.
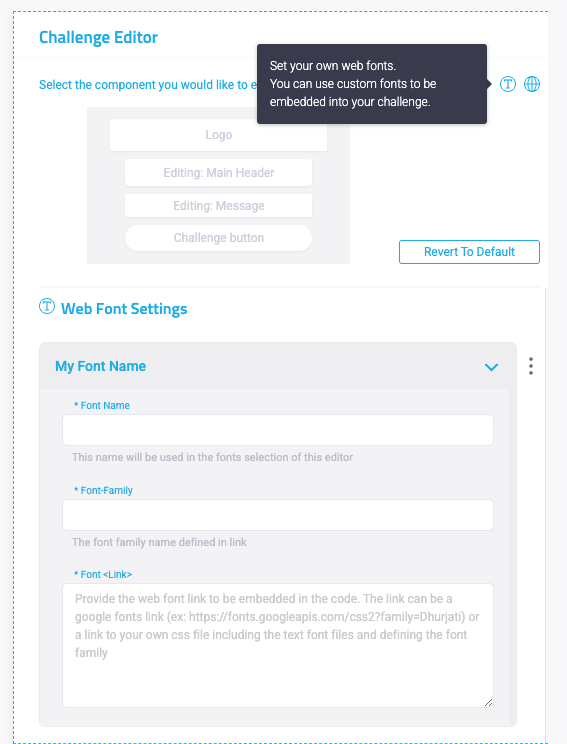
In the Toolbox click Add Web Font and fill the fields as such:
- Font name - a name so you can identify your added font when selecting fonts for the different areas.
- Font-Family - the name defined for the font you have added (for example Dhurjati). This will be set on the relevant css font-family property.
- Font Link - we support the following options:
- Google fonts - provide the font link as in the following example: (https://fonts.googleapis.com/css2?family=Dhurjati)
- Custom file - provide a link to your own css file including the text font files and defining the font family.
The fonts do not need to be actively saved, after defining them feel free to move to the relevant challenge area and select it for that area in the font family dropdown under Your custom fonts (see beneath)