Allowlist
The Allowlist is one of the Product Settings pages, accessible via the left sidebar.
Description
The Allowlist is composed of all the scripts’ actions that the detection mechanism treats as acceptable or permitted.
This includes all the actions that correspond to incidents that were manually “Added to the allow list” or marked as such automatically.
Large websites that contain a lot of scripts may result in very large allowlists of 10-15K actions or more.
There’s a different allowlist for each Application + Host Domain (for example, when 3 host domains refer to a single Application entity, there will be 3 allow lists).
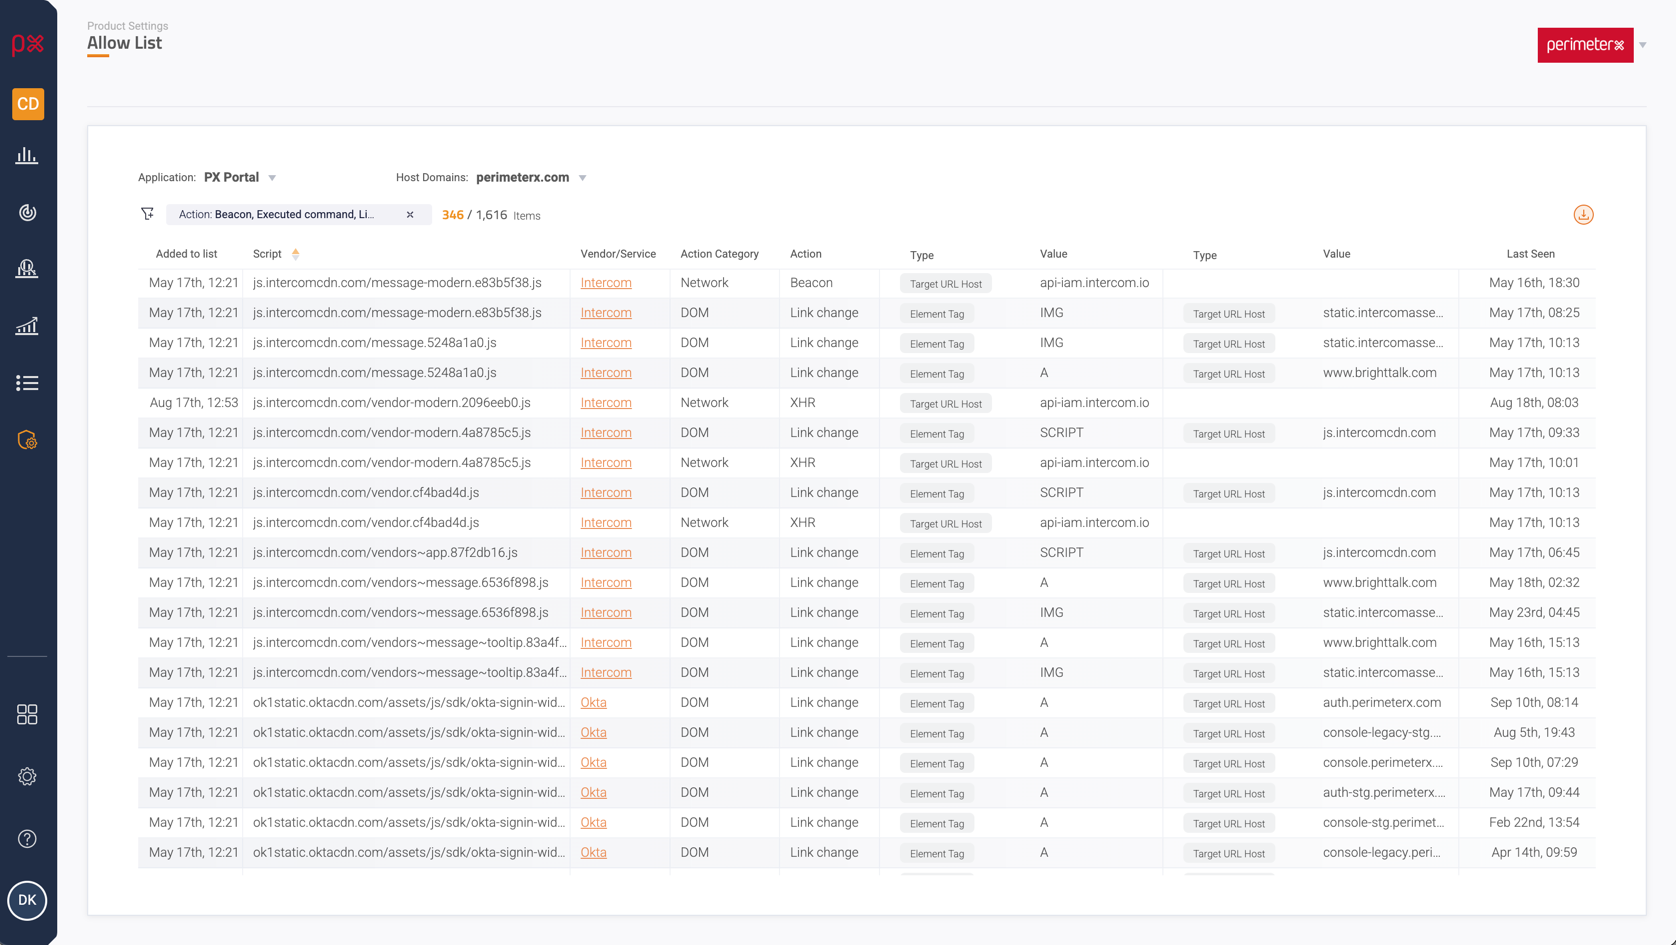
The list is presented in a table, specifying the following metadata on each allowed action:
- The date when it was added to the list
- The script that performed the action (can be clicked and inspected for source code or for analysis)
- The vendor or service behind the script
- The category of the action, e.g. DOM, Network, Execution
- The action itself, e.g. Link change, XHR
- The 1-2 parameters that were identified as part of the action, broken down to the parameter type and value
- When the action was last seen
Filtering and Sorting
You can sort the allowlist can by clicking the small arrows that appear beside the column headers when hovering over the headers row.
Any column that supports sorting will show such arrows and when clicked, the sort direction will be reflected by highlighting the corresponding arrow direction.
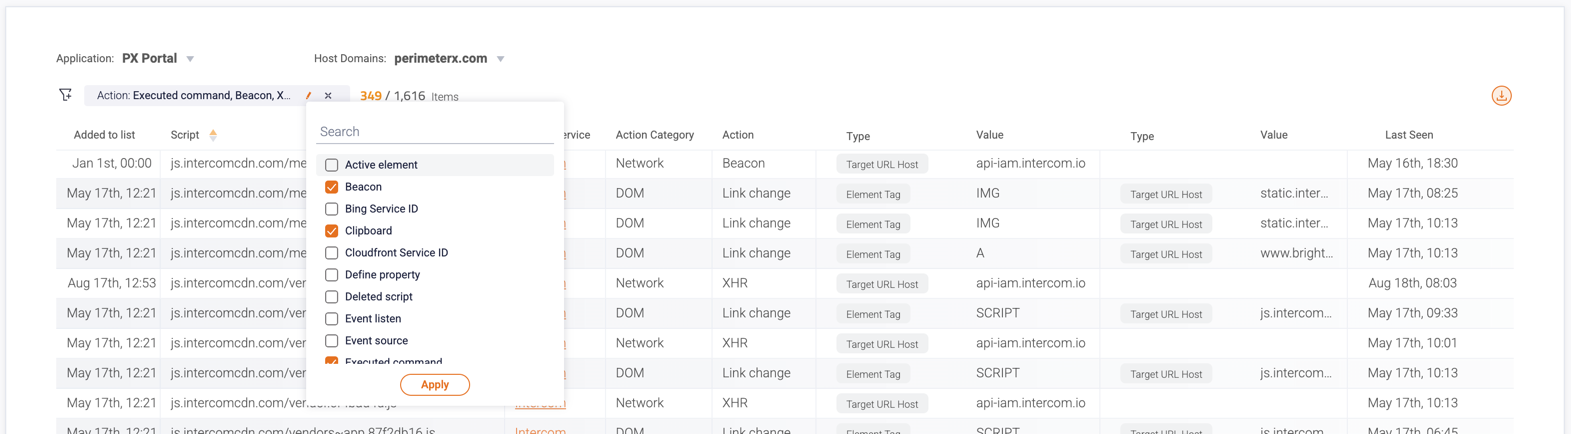
You can filter the allowlist by clicking the icon that appears above the table to the left.
A menu is shown, comprised of the fields that support filtering: selection can be made for multiple values of the same filter category, or across different categories, and are taken into effect when clicking “Apply”.
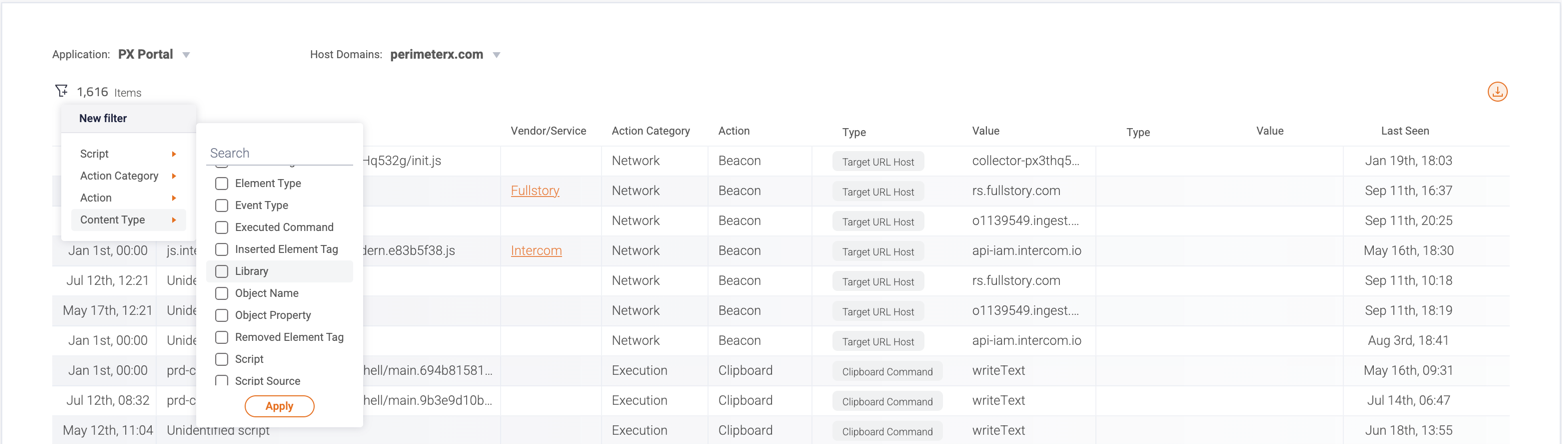
The chosen filters are shown in a dedicated panel above the table, and can be edited directly if needed, or removed altogether. The number of filtered items appears to the right, out of the total number of allowed actions.
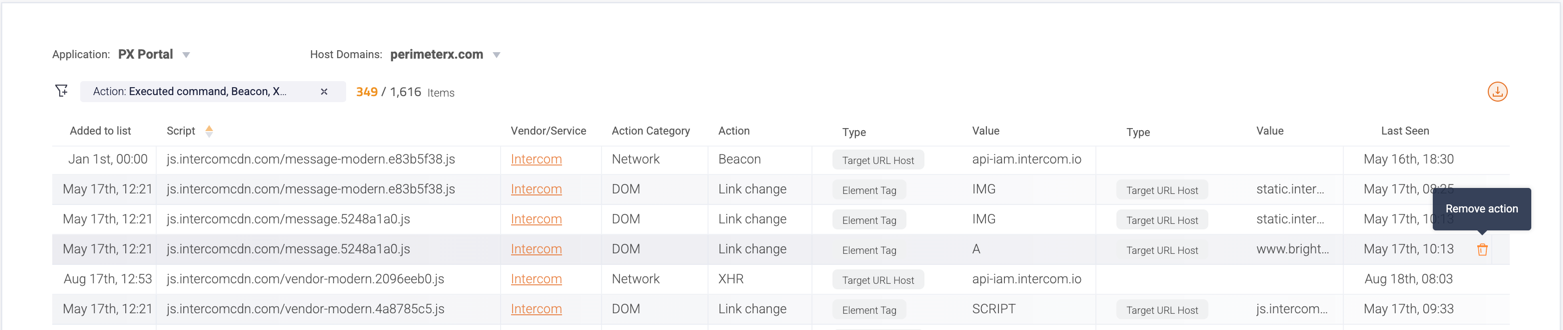
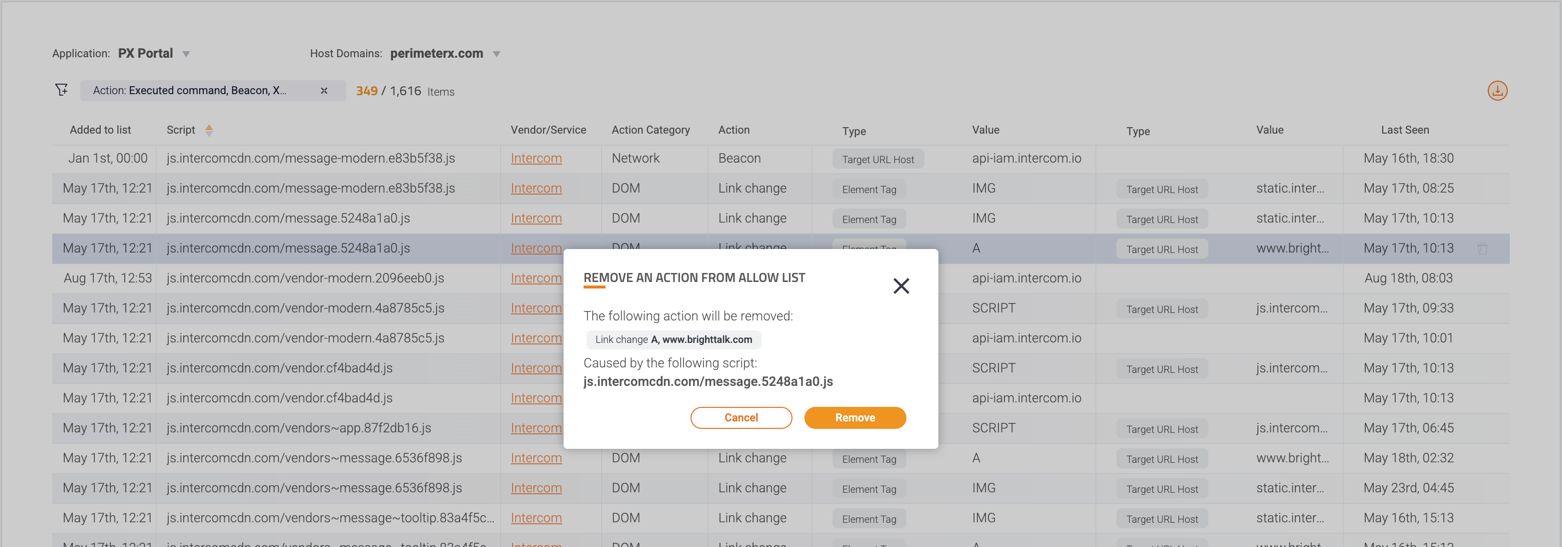
Remove an action
An action can be removed from the allowlist, by hovering over the relevant row and clicking the trash can icon that appears to the far right.
Once removed, if the action is once again performed by the script, it will be identified and will result in a new unclassified incident.
When the icon is clicked, a dialog window is shown with the action’s metadata:
Export
The allowlist can be exported in CSV format by clicking the export icon:
