Mitigation actions
Mitigation actions let you automatically send incident information through an API request to your organization, then trigger mitigation, or send an email to your users whenever your Policy Rules are met. You can learn how to create mitigation actions with this article.
These actions only support acccount-related events.
Prerequisites
- Appropriate role permissions to add and manage actions. By default, this is an Admin in Sightline.
- The appropriate integration to set up an action:
- For email mitigation actions, you need an email integration.
- For Auth0 mitigation actions, you need an Auth0 integration.
- For Okta mitigation actions, you need an Okta integration.
- For other mitigation actions, you need an HTTP integration.
- If you want to send custom data, you need existing custom parameters first. See Set custom parameters for more information.
Create a mitigation action
- Navigate to Sightline Cyberfraud Defense > Settings > Mitigation > Custom Action Settings.
- Under the Mitigation section, click the type of action you want to create.
- Click + Add Action.
- Complete the following fields. These fields are all the same no matter which type of action you create.
- Action name: The name of the action and how it will appear in your HUMAN account.
- Cooldown duration: The length of time that Sightline should wait to trigger this action each time it detects a match on the Policy Rule it’s assigned to.
- Duration unit: The unit of time for the cooldown duration.
- Integration: Select the integration you want to use.
- Application data source: The application you want to send data from. You can only select one application per action.
- Event type: The type of event you want to mitigate.
- Complete any unique fields based on the type of action you’re making.
Email to Consumer
- From Name: The name of the sender that your users will see on the email.
- Logo (optional): Upload a logo to display in the email.
- Reset Password link: Provide a link that users will use to reset their password.
- Contact Support Email Address (optional): Provide an email address your users can contact for further support. If you do not want to provide one, toggle this option to OFF.
Trigger MFA
- Content Settings: Select each field you want to include in the request. You can’t change any default fields.
Disable Account
- Content Settings: Select each field you want to include in the request. You can’t change any default fields.
Reset Password
- Content Settings: Select each field you want to include in the request. You can’t change any default fields.
Auth0/Disable Account
This action doesn’t have additional fields.
Auth0/Disconnect account
This action doesn’t have additional fields.
Okta/Disable Account
- Send Email: Toggle ON this option if you want Okta to send email notifications to your Okta admin whenever disabling or deactivating an account.
Okta/Disconnect account
- Forget Devices: Toggle ON this option if you want Okta to clear the account’s remembered factors when disconnecting the account.
Okta/Reset Password
- Send Email: Toggle ON this option if you want Okta to send a password reset email to the account user.
- Revoke Sessions: Toggle ON this option if you want to revoke all user sessions except the current one when resetting the password.
Other Mitigation
- Content Settings: Select each field you want to include in the request. You can’t change any default fields.
- Click Save changes.
Your mitigation action has been created. Next, be sure to add it to a policy rule.
Add a mitigation action to a Policy Rule
Once you have an action, we recommend adding it to a policy rule.
Be sure your policy rule’s application and event type match the ones you chose above. Otherwise, the action won’t appear when you try to add it to the rule.
- Navigate to Sightline Cyberfraud Defense > Policies > Account Policies.
- Select a rule to edit or create a new rule. See our article for more on creating policy rules.
- From the Actions menu, click and drag Mitigation to the THEN field.
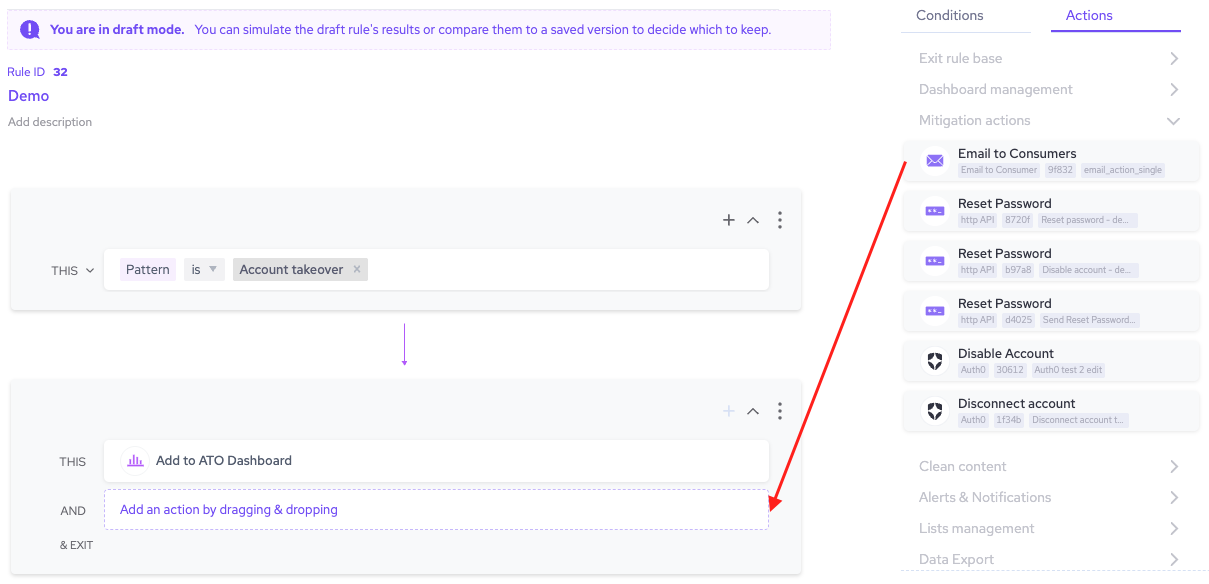
- Finish any other changes to your policy rule, then click Simulate rule.
- Click Save changes.
Now, whenever Sightline detects an attack that matches the conditions in that policy rule, it will trigger your mitigation action automatically.