Create Code Defender policy rules
Policy Rules let you set up security measures to allow or deny specified script actions and to authorize new or modified scripts to meet PCI DSS 4 requirements. Once a rule is active and a new script or action is detected, then Code Defender goes through the following steps:
- It checks the script action against each policy rule for any matching conditions.
- If Code Defender does find a match:
- Client-side rules:
- The action will be added to Policies > Allow list or Deny list
- Incidents related to this action will not appear in the Client-side > Dashboard
- Alerts and notifications related to this action will not be sent to configured integrations
- PCI DSS rules:
- The script status will change to Authorized in the PCI DSS > Inventory
- The script will no longer appear in the PCI DSS > Dashboard
- New/modified script alerts & notifications will not be sent to configured integrations
- If there is not a match, then:
- For Client Side rules, Code Defender will send the action to Client-side > Dashboard > Unclassified incidents for your manual review
- For PCI DSS rules, Code Defender will set the script status to “Unauthorized” in the PCI DSS > Dashboard and PCI DSS > Inventory for your manual review
- Corresponding alerts and notifications will be triggered to configured integrations in each case
These steps happen automatically, meaning that you can customize your policy rules to automate your workflow and reduce the time it takes to address potential threats or incidents.
You can learn how to create policy rules with this article.
Prerequisites
- To create or make changes to policy rules, you must have at least a Developer role.
- Different types of rules may be available depending on product entitlements.
Create Client-side rules
Create a block rule
Block rules deny script actions based on the conditions you specify. However, this does not block the scripts themselves. Script actions that match a block rule will appear in your Code Defender > Policies > Deny List.
To create a block rule:
- Navigate to Code Defender > Policies > Policy Rules.
- Select Create new rule, then select Block Rule.
- Enter a Rule name and Rule description, then select Create rule.
- In the Host Domain field, complete the following:
- Select the in dropdown to choose an operator, either in or not in.
- Specify one or more host domains you want to deny actions from. You can enter multiple domains or select All host domains in this application.
- In the Script field, complete the following:
- Select the in dropdown to choose an operator, either in or not in.
- Specify one or more script vendors or specific scripts you want to deny actions from. You can enter multiple vendors, select All scripts, or enter specific script names that may otherwise not appear in the dropdown menu.
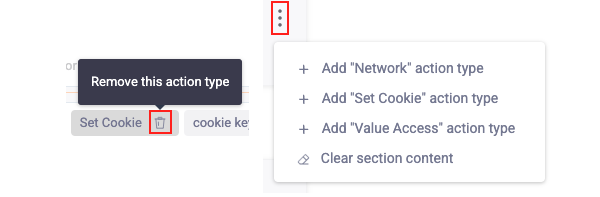
- Remove any Script Actions that you do not want to keep for your rule.
You can remove any behaviors you do not need, but you must have at least one to finish creating a rule. You can add behaviors you remove back into a rule at any time.
- For each remaining Script Action Type field, complete the following:
- Select the in dropdown to choose an operator, either in or not in.
- Specify one or more values.
- Select Save draft.
- Navigate to Client-side Rules > Draft.
- On the rule you just created, select More options > Activate rule.
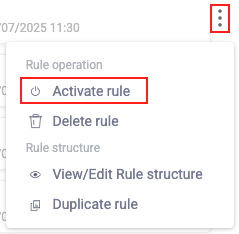
- Select a Rule priority, then select Activate rule. See Active rule priority for more information on how they’re applied.
You’ve created and implemented your new block rule.
Create an allow rule
Allow rules allow script actions based on the conditions you specify. Script actions that match an allow rule will appear in your Code Defender > Policies > Allow List.
To create an allow rule:
- Navigate to Code Defender > Policies > Policy Rules.
- Select Create new rule, then select Allow Rule.
- Enter a Rule name and Rule description, then select Create rule.
- In the Host Domain field, complete the following:
- Select the in dropdown to choose an operator, either in or not in.
- Specify one or more host domains you want to allow actions from. You can enter multiple domains or select All host domains in this application.
- In the Script field, complete the following:
- Select the in dropdown to choose an operator, either in or not in.
- Specify one or more script vendors or specific scripts you want to allow actions from. You can enter multiple vendors, select All scripts, or enter specific script names that may otherwise not appear in the dropdown menu.
- Remove any Script Actions that you do not want to keep for your rule.
You can remove any behaviors you do not need, but you must have at least one to finish creating a rule. You can add behaviors you remove back into a rule at any time.
- For each remaining Script Action Type field, complete the following:
- Select the in dropdown to choose an operator, either in or not in.
- Specify one or more values.
We recommend taking advantage of not in to exclude the riskiest script actions when auto allowing a vendor or category of scripts.
- Select Save draft.
- Navigate to Client-side Rules > Draft.
- On the rule you just created, select More options > Activate rule.
- Select a Rule priority, then select Activate rule. See Active rule priority for more information on how they’re applied.
You’ve created and implemented your new allow rule.
Create PCI-DSS rules
Create an authorize rule
Authorize rules automate new or modified script authorization per PCI DSS based on the conditions you specify. Authorized scripts will be marked Authorized in your Code Defender > PCI DSS > Inventory.
- Navigate to Code Defender > Policies > Policy Rules.
- Select Create new rule, then select Authorize Rule.
- Enter a Rule name and Rule description, then select Create rule.
- In the Host Domain field, complete the following:
- Select the in dropdown to choose an operator, either in or not in.
- Specify one or more of your host domains to which you want the rule to apply. You can select multiple domains or select All host domains in this application.
- In the Script field, complete the following:
- Select the in dropdown to choose an operator, either in or not in.
- Specify one or more script vendors or script categories whose scripts you want to auto-authorize. You can select multiple vendors and categories or select All scripts.
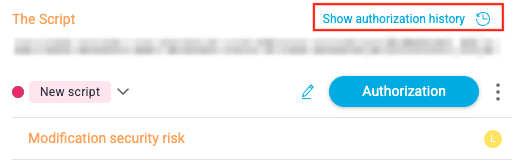
- In the Authorize Script field, enter an Authorization note. This will be logged every time PCI DSS authorizes a script that matches this rule. Authorization notes appear in PCI DSS > Audit Report and in each script’s Authorization History, which appear when you open a script in PCI DSS > Dashboard or Inventory.
- Select Save draft.
- Navigate to PCI DSS Rules > Draft.
- On the rule you just created, select More options > Activate rule.
- Select a Rule priority, then select Activate rule. See Active rule priority for more information on how they’re applied.
You’ve created and implemented your new authorize rule.
Create a custom rule
Custom rules are policy rules with more robust options and applicable logic. Unlike the other types of rules, custom rules have the following features:
- You can create multiple logical sets of host domain(s), script vendor(s), and script action(s). Each set uses its own conditions and can have nested logic. Code Defender will take action on script actions that match the conditions from all sets.
- Each set does not need all the host domain(s), script vendor(s), or script action(s) conditions specified. Instead, each set can use only one, any combination of two, or all three conditions.
- You can take any action. This means you can block, allow, or authorize. You can only choose one action per custom rule.
Custom rules give you the most flexibility for creating rules, but this flexibility can also create unintended consequences. We recommend you do not create custom rules unless you are very comfortable with working with custom logic.
Example policy rule
Below is a sample rule and an explanation of its logic. You can reference this if you’re having trouble understanding how policy rule logic works.
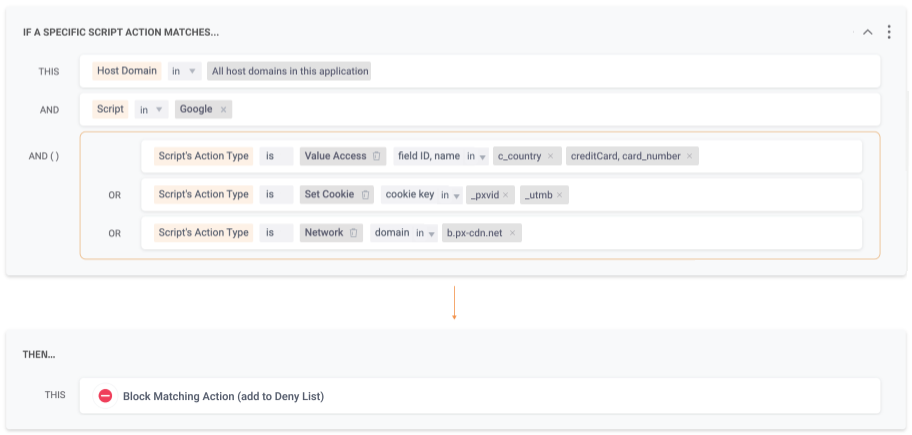
In this rule, there are three sets of conditions, one of which has nested logic. This rule’s logic dictates that, for a given script:
- If the host domain matches all host domains in this application, AND
- If the script vendor is Google, AND
- If the script action type matches any one of the following:
- The action is Value Access and the field ID and name match c_country or creditCard, card_number. Value access options with two values have an element ID and element name, while those with one value only have the element ID and do not have an element name.
- The action type is Set Cookie and the cookie key is _pxvid or _utmb
- The action type is Network and the domain is b.px-cdn.net
- THEN Client-side will block the specific detected action being evaluated
The action is straightforward: if a script matches the listed conditions, then according to this rule, Client-side will Block that script’s action.
The conditions logic can be more complicated. Let’s start with the first two, which are easier:
- The host domain condition tells Client-side to match only actions detected on the listed host domains. In this case, this is all host domains associated with the application.
- AND the script condition tells Client-side to look for scripts who themselves match any of the listed scripts or the listed vendors. In this case, this is Google.
To sum it up: the first two conditions check that the incoming script matches the given conditions. Based on just these conditions, Client-side will block incidents detected on any host domain in your application AND taken by any script belonging to Google. Incidents detected on any host domain in the application but belonging to Facebook, for example, would not be blocked.
Next, let’s look at the script action type conditions, which use nested logic with three different types of actions:
- The first action type tells Client-side to look for actions that are Value Access actions and whose field ID or name are c_country or creditCard, card_number.
- The second action type tells Client-side to look for actions that are Set Cookies actions and whose cookie key are _pxvid or _utmb.
- The third action type tells Client-side to look for actions that are Network actions and whose domain is b.px-cdn.net.
- The OR between these conditions means that Client-side will block script actions if the detected script matches any one of these conditions.
To sum it up: this set of nested conditions tells Client-side to block any script actions when the script accesses values with field names that are exactly c_country or creditCard, card_number, or when the script sets cookies with cookie keys that are exactly _pxvid or _utmb, or when the script uses a network action with the exact domain b.px-cdn.net.
To put it all together, note the final AND() operator between the Script condition and the Script’s Action Type nested conditions. This means that Client-side will block script actions whose attributes match all of these conditions at once.