Bot Defender Policy Settings
After you set up your applications in Bot Defender, you can access and create policies from your Policy Settings. Policy Settings lets you configure Policy Rules that determine how your application can be accessed and monitor its activity. You can have multiple Settings at once.
You can learn more about the Policy Settings page with this article.
Prerequisites
While anyone can view Policy Settings, there are some features where you must have specific permissions to access them.
- To generate a new risk cookie key or to make changes to rules, you must have at least an Analyst role.
- To add or remove applications or change policy statuses, you must have an Admin role.
About Policy Settings
You can access Policy Settings from Bot Defender > Policies > Policy Settings. There are three major sections:
- Policy Settings: Manage and switch between Policy Settings.
- Applications connected to Policy: View and assign applications to the selected Policy Setting.
- Policy rules: View and manage the rules associated with the selected Policy Setting.
Policy Settings

You can switch between existing groups of Settings from the Policy Settings dropdown. If you have proper permissions, you can also access:
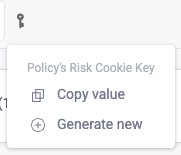
- Policy’s Risk Cookie Key: The unique key for the selected Policy Setting. This is typically used for Enforcer configurations. You can:
- Copy value: Copy the key to your device’s clipboard.
- Generate new: Create a new key. This replaces the existing key and can affect other places where you may be using the current key.

- Manage Policy Settings: You can:
- Create a new Setting

- Duplicate the current Setting

- Delete the current Setting
 . This action is permanent.
- Create a new Setting
- Discard and Save Changes: Discard or save any changes you make for the selected Policy Setting.
Applications connected to Policy
You can quickly view which applications use the selected Policy Setting from the Applications connected to Policy category.
You can expand the category by selecting it. From here, you can:
- Connect applications: Select the + to add an application to the current policy. You can only assign an application to one policy at a time.
- Toggle policy status and control: Select the toggle next to each application to enable Bypass or Active mode.
- Bypass: Disable detection and set request scores to 0. If you’re using the JavaScript Client, this also limits it to cookie management.
- Active: Enable detection.

Policy rules
The Policy rules section is where you can customize Bot Defender’s access control and activity settings. You can do different things per rule type, which are:
- Custom rules
- Known bots & Crawlers
- IP classification
- Access tokens
- Rate limiting rules
- Volume based rules
Custom rules
You can create your own custom rules in addition to Bot Defender’s default ones to best suit your applications’ needs using our provided conditions and logic. You can learn more about creating custom rules with our help article.
Known bots & Crawlers
HUMAN maintains a list of known bots and crawlers and creates a rule for each in the Known bots & Crawlers section. You can decide how to handle each of these at your discretion. HUMAN allows most known bots and crawlers by default unless we deem it abusable, in which case we deny them by default. Abusable rules are denoted with an exclamation mark ![]() .
.
To customize a rule:
- Select Policy Rules > Known bots & Crawlers.
- For each rule you want to customize:
- Select a Rule response. You can set the rule to either allow or deny the bot or crawler whenever Bot Defender detects it.
- Toggle the rule Off or On.
- Select Save changes.
In addition to customizing rules for each bot and crawler, you can also:
- Suggest new bot: If you think we’re missing a bot or crawler from the list, you can submit it for our review.
- Notify me via email: Select this option to receive email notifications whenever we add new bots or crawlers to this list.
- Download CSV: Download a CSV file of your Known bots & Crawlers rules.
IP classification
HUMAN maintains a list of IPs and creates a rule for each in the IP classification section. You can decide how to handle each of these at your discretion. HUMAN allows most IPs by default. To customize a rule:
- Select Policy Rules > IP classification.
- For each rule you want to customize:
- Select a Rule response. You can set the rule to either allow or deny the bot or crawler whenever Bot Defender detects it.
- Toggle the rule Off or On.
- Select Save changes.
In addition to customizing rules for each bot and crawler, you can Download a CSV of your IP classification rules.
Access tokens
In this section, you can create unique access tokens. After you add an access token to a request as an HTTP header, Bot Defender will allow those requests on your application.
Access tokens are shared across all policy settings associated with your account, not just the one you are currently editing.
To create a token:
- Select Policy Rules > Access tokens.
- Select Add access token.
- You can customize the token that appears with the following:
- Token name: Select the token’s name to update it.
- Lifetime: Select how long you would like the token to be active.
- Repeat Steps 2-3 for any additional tokens you want to create.
- Select Save changes.
Once you have a token, you need to add it to the request you want Bot Defender to allow.
- Select the copy icon next to the token you created.
- Add an HTTP header named
x-px-access-tokento the request you want to allow. - Paste the token as the
x-px-access-tokenvalue.
Now, Bot Defender will allow that request until the access token expires. Once it does, it will no longer work after the expiration date even if it is still part of the request.
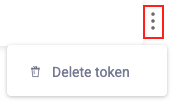
You can delete a token at any time using the more options icon next to each row.

Rate limiting rules
You can create rate limiting rules, or rules that determine how often an authorized service can access your application, from this section. To create a rule:
- Navigate to Policy Rules > Rate limiting rules.
- Select Add rate limit rule.
- Complete the following columns:
- Authorized service: Select a service to create the rate limit for from the dropdown menu.
- Rule: Add a page limit and time interval for the rule. The page limit has a minimum value of one, while the time interval has a minimum value of 10.
- Lifetime: Choose how long the rule applies for.
- Repeat Steps 2-3 for any additional rate limit rules you want to create.
- Select Save changes.
You have created rate limiting rules for your selected services.
You can delete a custom rule at any time using the more options icon next to each row.

Volume based rules
In this section, you can create Volume based rules, or rules that determine how many pages or requests Bot Defender processes over a period of time. You can create two different types of volume based rules:
- Page view based: Rules that limit the number of pages per visitor within a certain time period
- Request based: Rules that limit the number of requests per client IP within a certain time period
To create a page view based rule:
- Navigate to Policy Rules > Volume based rules.
- Select Add page request based rule.
- Complete the following columns:
- Category: Select the source to count page views from.
- Rule: Add a page limit and time interval for the rule. The page limit and time interval’s minimums are 10.
- Off/On: Toggle the rule off or on.
- Repeat Steps 2-3 for any additional rate limit rules you want to create.
- Select Save changes.
To create a request based rule:
- Navigate to Policy Rules > Volume based rules.
- Select Add request based rule.
- Complete the following columns:
- Category: Select the source to count requests from.
- Rule: Add a page limit and time interval for the rule. The page limit and time interval’s minimums are 10.
- Apply on: Select where in the Policy Setting’s applications to apply this rule on. You can apply it to the entire application, or you can apply it to specific places with Create a new section. If you’re creating a new section:
- Provide a section name, which is how this section appears in your account.
- Provide URLs to the specific areas you want to add to this section. You can include multiple URLs separated by commas or new lines.
- Off/On: Toggle the rule off or on.
- Repeat Steps 2-3 for any additional rate limit rules you want to create.
- Select Save changes.
You have created your volume based rule.
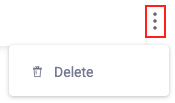
You can delete a custom rule at any time using the more options icon next to each row.
