Incidents Classification Workflow
Incidents can go through several phases:
- Unclassified: These appear in the Unclassified Incidents tab. The initial state of each new incident. The incident is considered unclassified until it’s moved to Under Review or added to either the Allow list or Deny list.
- Under Review: These appear in the Incidents Under Review tab. This is an optional state where the incident can be marked for further inspection to better assess whether its behavior is either:
- Should be allowed and added to the Allow List, or
- Should be prevented and added to the Deny list
- Classified: The incident has been added to either the Allow List or Deny List and is no longer shown on the Dashboard.

Workflow
1. Move an Incident to Under Review
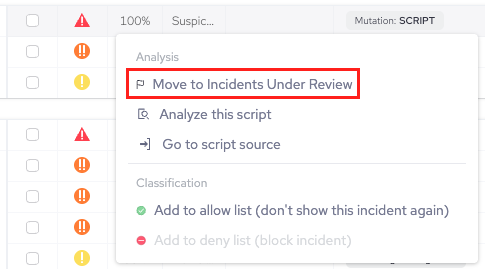
When a script’s behavior should be verified by a specific individual or team, you should click the relevant incident and choose Move to Incidents under review:

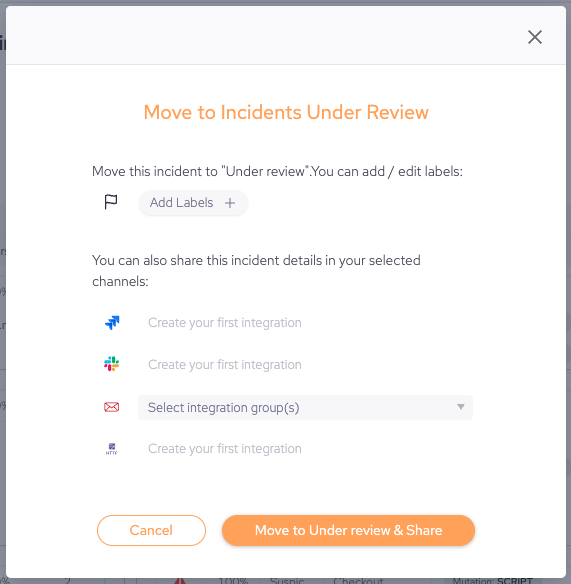
This opens the Move to Incidents Under Review window. From here, you can:
- Create and add labels to the incident
- Create a Jira ticket from the incident
- Send a Slack message of the incident
- Send an email of the incident
- Create a custom integration

Once you’re done, click Move to Under review & share. This updates the incident and moves it to the Incidents Under Review tab. After your team inspects the incident and there’s a better understanding of the specific script’s behavior, you can safely allow or deny the incident.
2. Add an incident to an allow or deny list
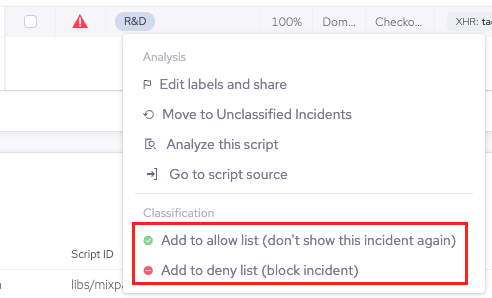
When a script’s behavior is known and you want to either allow or deny it, then you can:
- Click the relevant incident
- Choose either Add to allow list (don’t show this incident again) or Add to deny list (block incident).

Upon approval, the actions corresponding to the denied incident will be added to Policies > Allow List or Policies > Deny List depending on your selection.