Email mitigation
In the event of an account takeover, Account Defender can automatically send an email to your users that informs them of suspicious activity and lets them take action to secure their accounts if necessary. Account Defender sends these emails after activity matches an existing Policy Rule.
This feature is currently in beta and isn’t available in the console by default. Please email us at contact-support@humansecurity.com to enable and customize it.
Prerequisites
- Have the following ready when contacting the HUMAN team to configure this feature:
- The email domain and host that the emails will be sent from
- From name (required): The name of the sender that the recipient will see
- From address (required): The email address that the email will be sent from
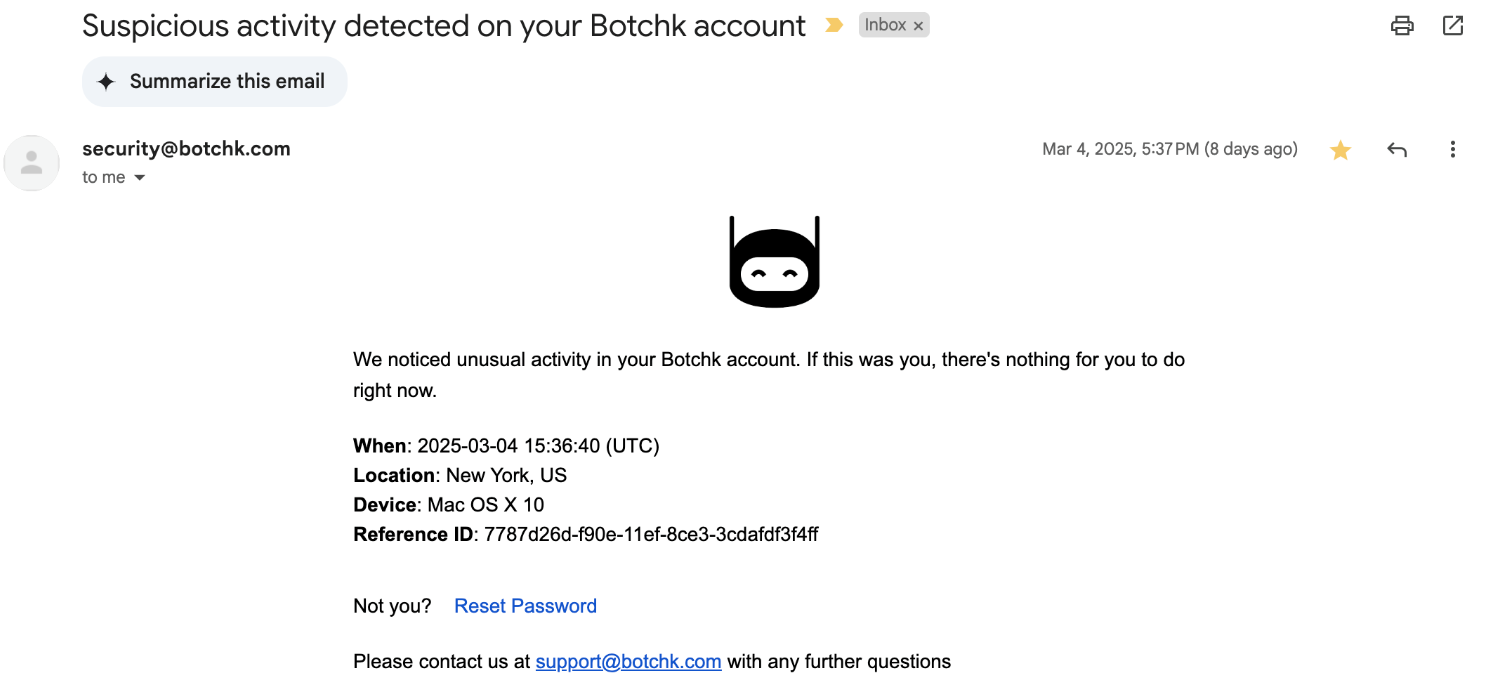
- Subject (required): The subject of the email. By default, this is “Suspicious activity detected on your <company_name> account”.
- Body (required): The main text of the email. There are different defaults for single or network attacks:
- Single: We noticed unusual activity in your account. If this was you, there’s nothing for you to do right now.
- Network: We noticed unusual activity in your account and we suspect it’s part of an attack. We highly recommend you to reset your account password.
- Not you? text (required): The text that asks the user if they were the one that performed the suspicious activity.
- Reset password URL (required): The URL to reset the password
- Reset password URL text (required): The text of the reset password URL. By default, this is “Reset Password”.
- Logo (optional): The logo that will appear at the top of the email.
- Reply to address (optional): Override the reply button email address. By default, this is the sender address.
- Contact text (optional): Text for additional contact information. For example, “Please contact us at <email_address> with any further questions”.
- The cooldown duration you want for the action, which is the length of time in days or hours that Account Defender should wait to trigger this action each time it detects a match on the rule it’s assigned to.
- The ability to access and configure DNS records for the email domain
- To add email mitigation as an action to a policy rule, you need at least an Admin role.
Add email mitigation to a policy rule
Once email mitigation is enabled on your account, you can add it as an action to an existing or new policy rule.
- Navigate to Account Defender > Policies > Policy Rules.
- Select a rule to edit or create a new rule. See our article for more on creating policy rules.
- From the Actions menu, click and drag Alert User to the THEN field.
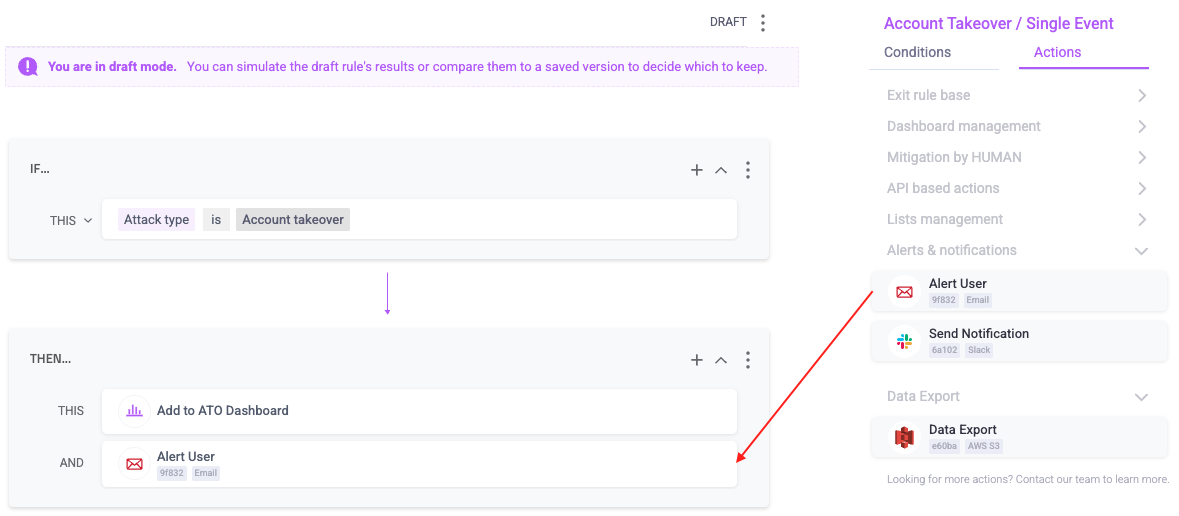
- Finish any other changes to your policy rule, then click Simulate rule.
- Click Save changes.
Now, whenever Account Defender detects an attack that matches the conditions in that policy rule, the account owner will receive an email notifying them that someone tried to access their account similar to the example below.