Data export
Data Export actions let you automatically export data whenever Account Defender detects an attack that matches the policy rule you add it to.
Prerequisites
- An existing Account Defender policy rule to add the action to. See Create Account Defender policy rules for more information.
- Have Account Defender Admin permissions to add and manage actions. See Role permissions for more information.
- Integrate with a supported data export integration. See our integrations for more information.
- If you want to send custom data, you need existing custom parameters first. See Setting custom parameters for more information.
Create a data export action
Before you can add an action to a policy rule, you need to create it.
- Navigate to Account Defender > Settings > Action Settings.
- Click + Add Action.
- In Action Details, complete the following fields:
- Action name: The name of the action and how it will appear in your HUMAN account.
- Action type: Select Data Export. This will also show a preview of your data export.
- In Integration Details, select the integration you want to use for data export.
- In Policy Details, complete the following fields:
- Application data source: The application you want to send data from. You can only select one application per data export action.
- Event type: The type of event you want to send data about.
- In Content Settings, select each field you want to include in the request. You cannot change the default values.
- Click Save changes.
Your data export action has been created. Next, be sure to add it to a policy rule.
Add a data export action to a policy rule
Once you have a data export action, we recommend adding it to a policy rule so you can automate when a request is sent.
Be sure your policy rule’s application and event type match the ones you chose above. Otherwise, the action won’t appear when you try to add it to the rule.
- Navigate to Account Defender > Policies > Policy Rules.
- Select a rule to edit or create a new rule. See our article for more on creating policy rules.
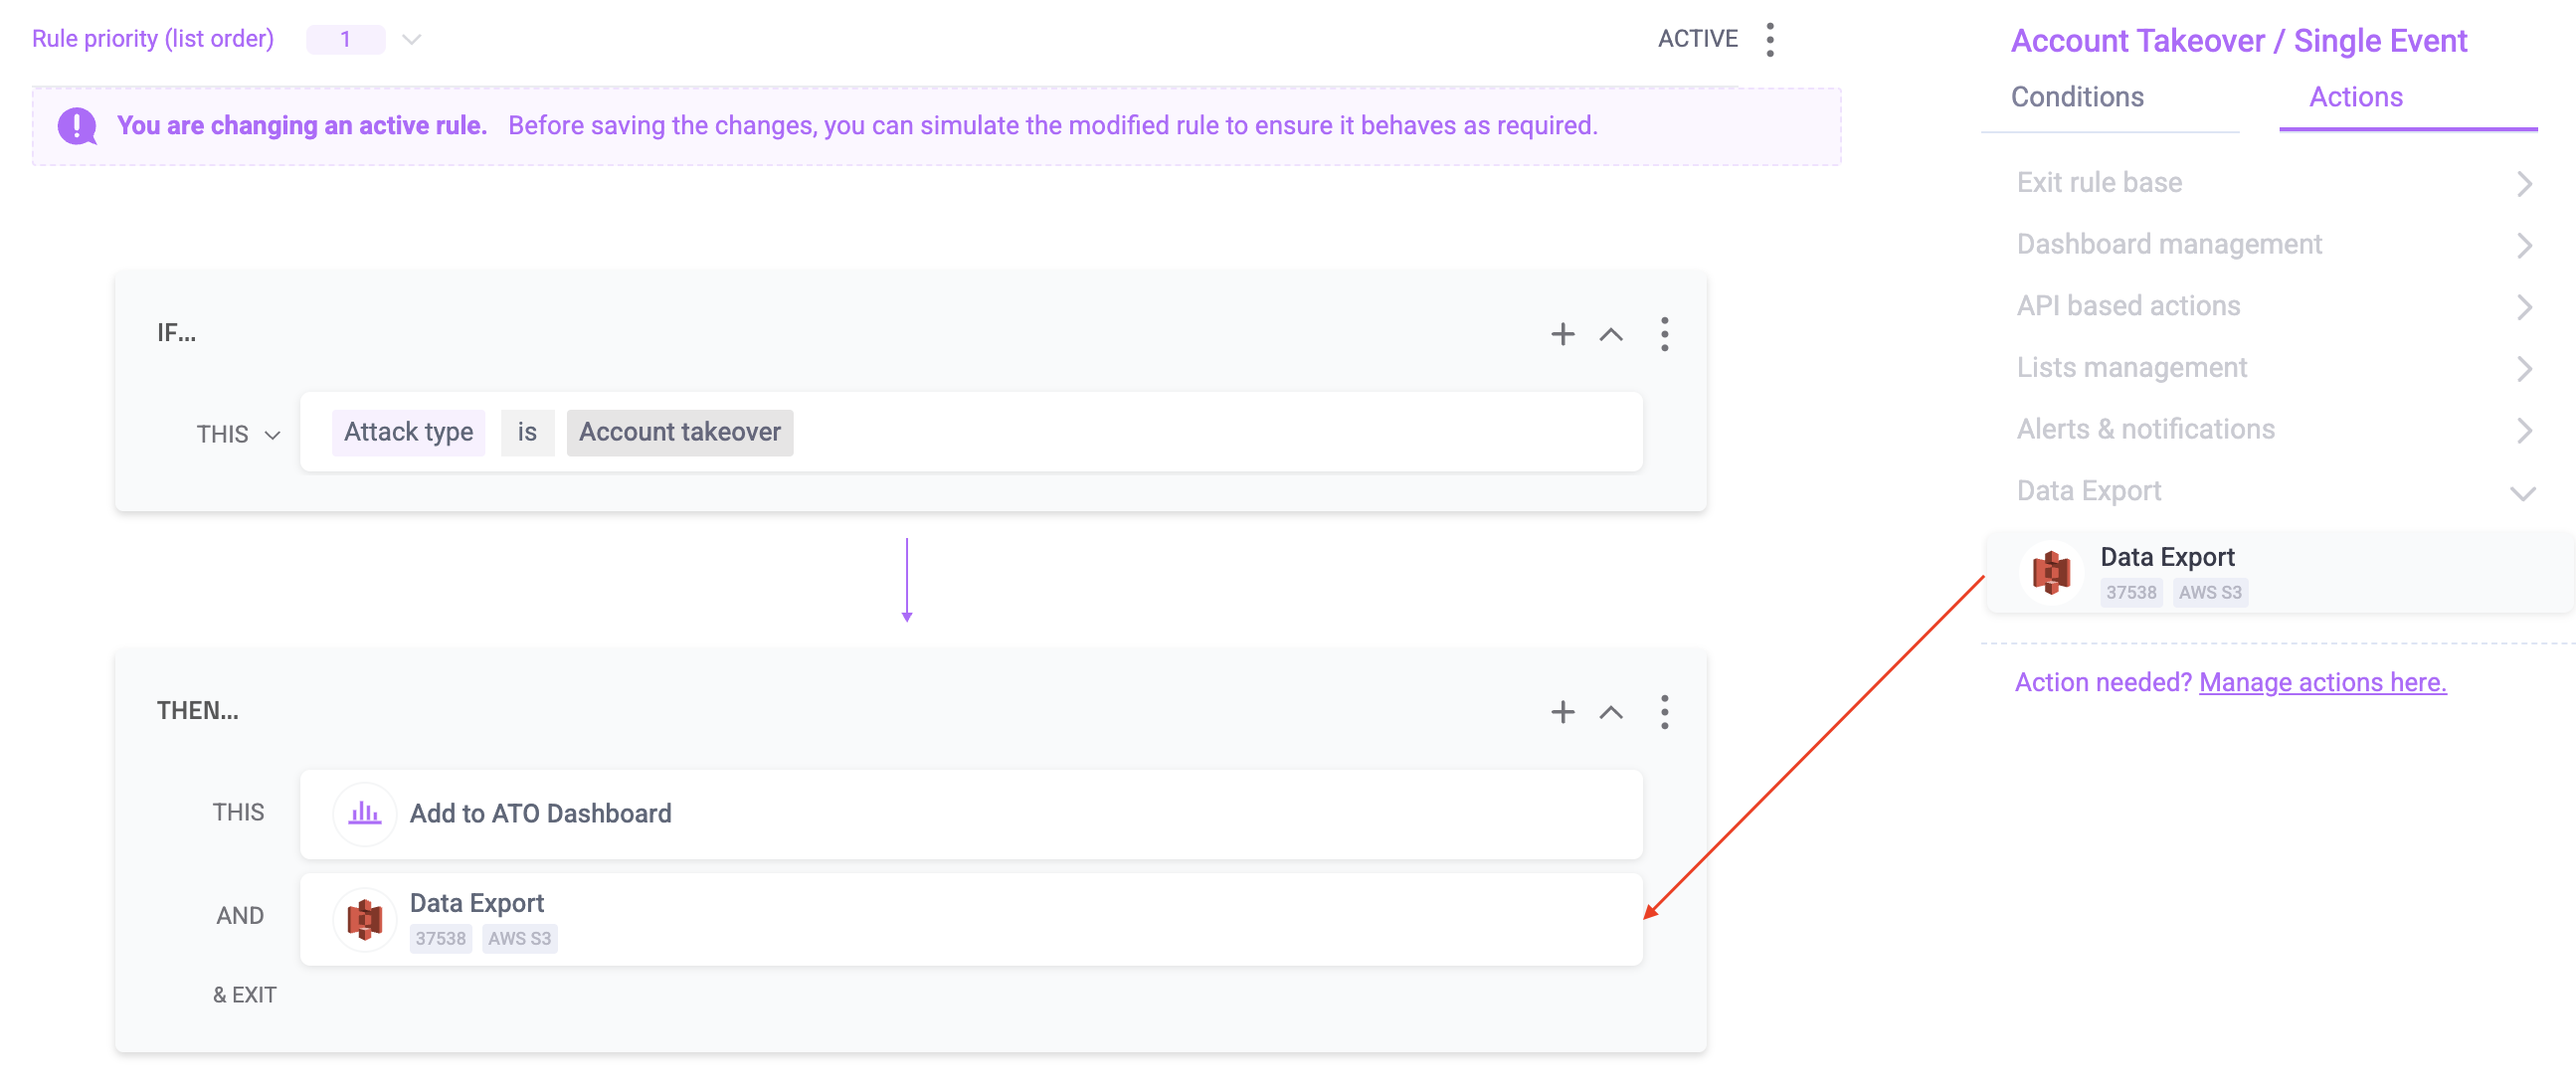
- From the Actions menu, click and drag Data Export to the THEN field.

- Finish any other changes to your policy rule, then click Simulate rule.
- Click Save changes.
Now, whenever Account Defender detects an attack that matches the conditions in that policy rule, the account owner will receive an email notifying them that someone tried to access their account similar to the example below.